Connect your own domain or subdomain with BlogSpot
Blogger is a Content Management System founded in 1999 by Pyra Labs, acquired by Google in 2003, which enables its users to write blogs. Google hosts the blogs, which can be accessed through a subdomain of blogspot.com but Blogs can also be accessed from a user-owned custom domain. Here is how you will do it. Try to do the whole process using a PC, not by any Phone.
Set up your domain or subdomain in Blogger
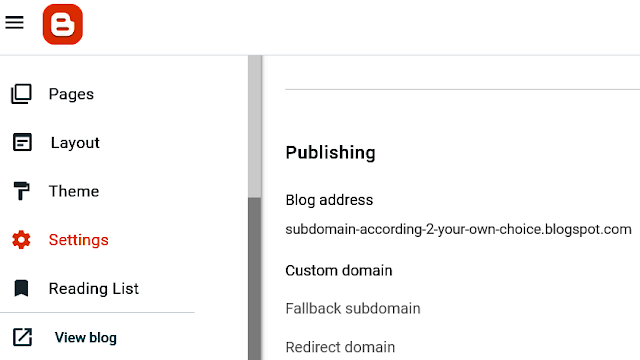
- Choose your blog.
- click Settings.
- Under “Publishing,” click Custom domain.

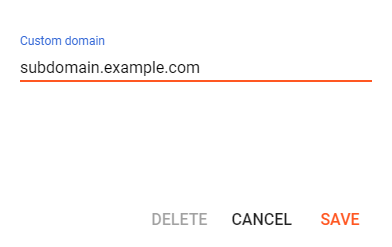
- Enter the URL of the domain that you bought. Note that Blogs must not be hosted at naked domains (ex: example.com). Please add a top-level domain (www.example.com) or subdomain (subdomain.example.com or articles.example.com etc)

- Click Save.
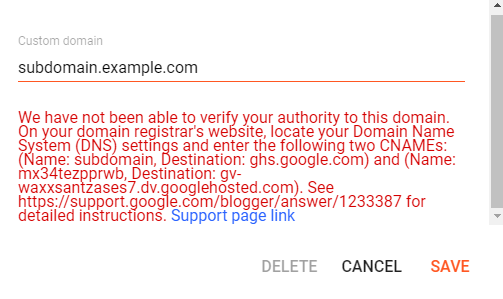
You will get an error with 2 CNAMEs:
- Blog CNAME: For name, enter the name as the subdomain, like "subdomain." or "www." For destination, enter “ghs.google.com.”
- Security CNAME: “Name: XXX, Destination: XXX.” This is different for each person and is specific to your blog and your Google Account.
For this example, we received this message:

We have not been able to verify your authority to this domain. On your domain registrar's website, locate your Domain Name System (DNS) settings and enter the following two CNAMEs: (Name: subdomain, Destination: ghs.google.com) and (Name: mx34tezpprwb, Destination: gv-waxxsantzases7.dv.googlehosted.com). See https://support.google.com/blogger/answer/1233387 for detailed instructions. Support page link
You must copy the the whole message and save somewhere secret and secured place instantly, to avoid the possibility of losing it.
Connect your domain with BlogSpot
- Go to your domain provider’s website. Maybe Godaddy, or BlueHost or NameCheap or anything else.
- Find the Domain Name System (DNS) in the control panel.
- Under "Host, Name, or Label" enter the subdomain. After that, under "Value, Destination, Target or Points to," enter "ghs.google.com." This is common for you and everyone else of this planet, even for aliens.
- Enter details for the second CNAME, which are specific to your blog and Google Account. Note that, if you want to use multiple subdomains, then you don't need to enter information for second CNAME again. But you will have to repeat the Step 3 of this paragraph again.
- To activate your DNS settings, wait at least one hour.
- Repeat Set up your domain in Blogger.
Redirect URL without subdomain to your main domain
To redirect your readers from “example.com” to “www.example.com,” set up a naked redirect:
- Go to your domain provider’s website.
- Open your DNS settings.
- Add these 4 A-records that point to Google IPs. If A-records for "example.com" already exist, you should remove the existing A-records.
216.239.32.21
216.239.34.21
216.239.36.21
216.239.38.21
Come back to BlogSpot.
- Choose your blog.
- click Settings.
- Under "Publishing," turn on Redirect domain (example.com to www.example.com).
How it will look like inside DNS settings?
| Type | Host, Name, or Label |
Value, Destination, Target, or Points to |
TTL |
|---|---|---|---|
| CNAME Record | mx34tezpprwb | gv-waxxsantzases7.dv.googlehosted.com | Automatic |
| CNAME Record | subdomain | ghs.google.com. | Automatic |
| CNAME Record | subdomain2 | ghs.google.com. | Automatic |
| CNAME Record | subdomain3 | ghs.google.com. | Automatic |
| CNAME Record | www | ghs.google.com. | Automatic |
| A Record | @ | 216.239.32.21 | Automatic |
| A Record | @ | 216.239.34.21 | Automatic |
| A Record | @ | 216.239.36.21 | Automatic |
| A Record | @ | 216.239.38.21 | Automatic |
Turn on HTTPS availability and redirect
After one or two hours
- Choose your blog.
- click Settings.
- Under "Publishing," turn on both.


